
캐릭터 조작 직접 만들기
기본적으로 제공 되는 thirdpersoncharacter가 어떻게 움직이는지 궁금해서 작성해보았습니다.
아래에 있는 언리얼 문서와 블로그를 참고 하였습니다.
언리얼 문서 링크
참고한 블로그
Unreal5 Enhanced Input 캐릭터 이동 및 점프 C++
Unreal5 Enhanced input 캐릭터 이동 및 점프 C++ 안녕하세요. 오늘은 언리얼5에서 EnHanced input을 사용해서 캐릭터 이동과 점프를 구현해 보겠습니다. 그냥 공부한 내용 대충 작성하는거라 효율이랑은 거
intunknown.tistory.com
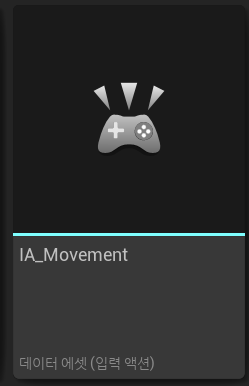
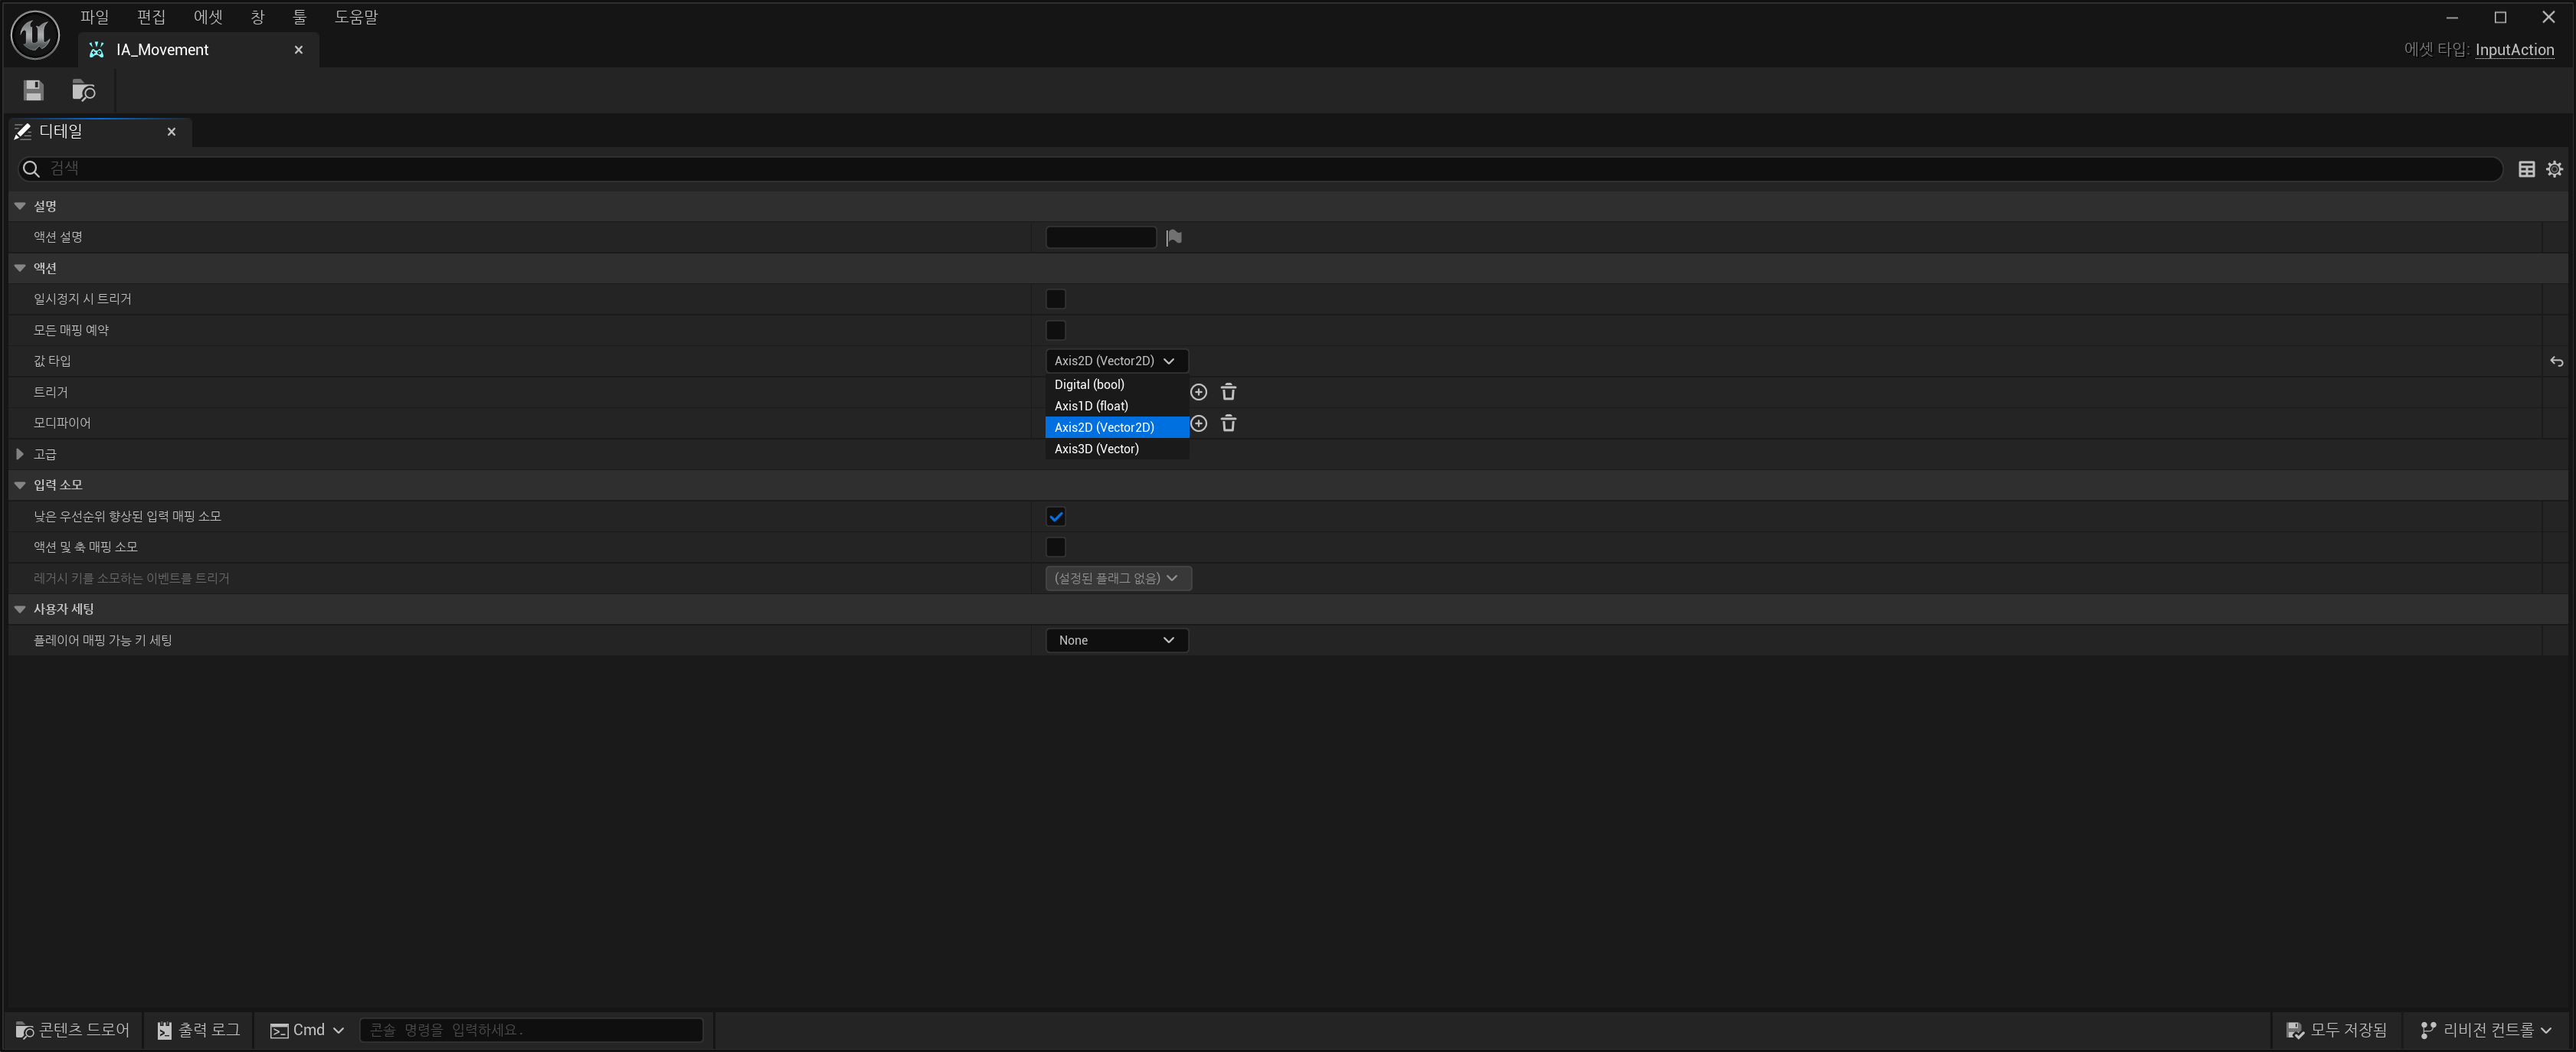
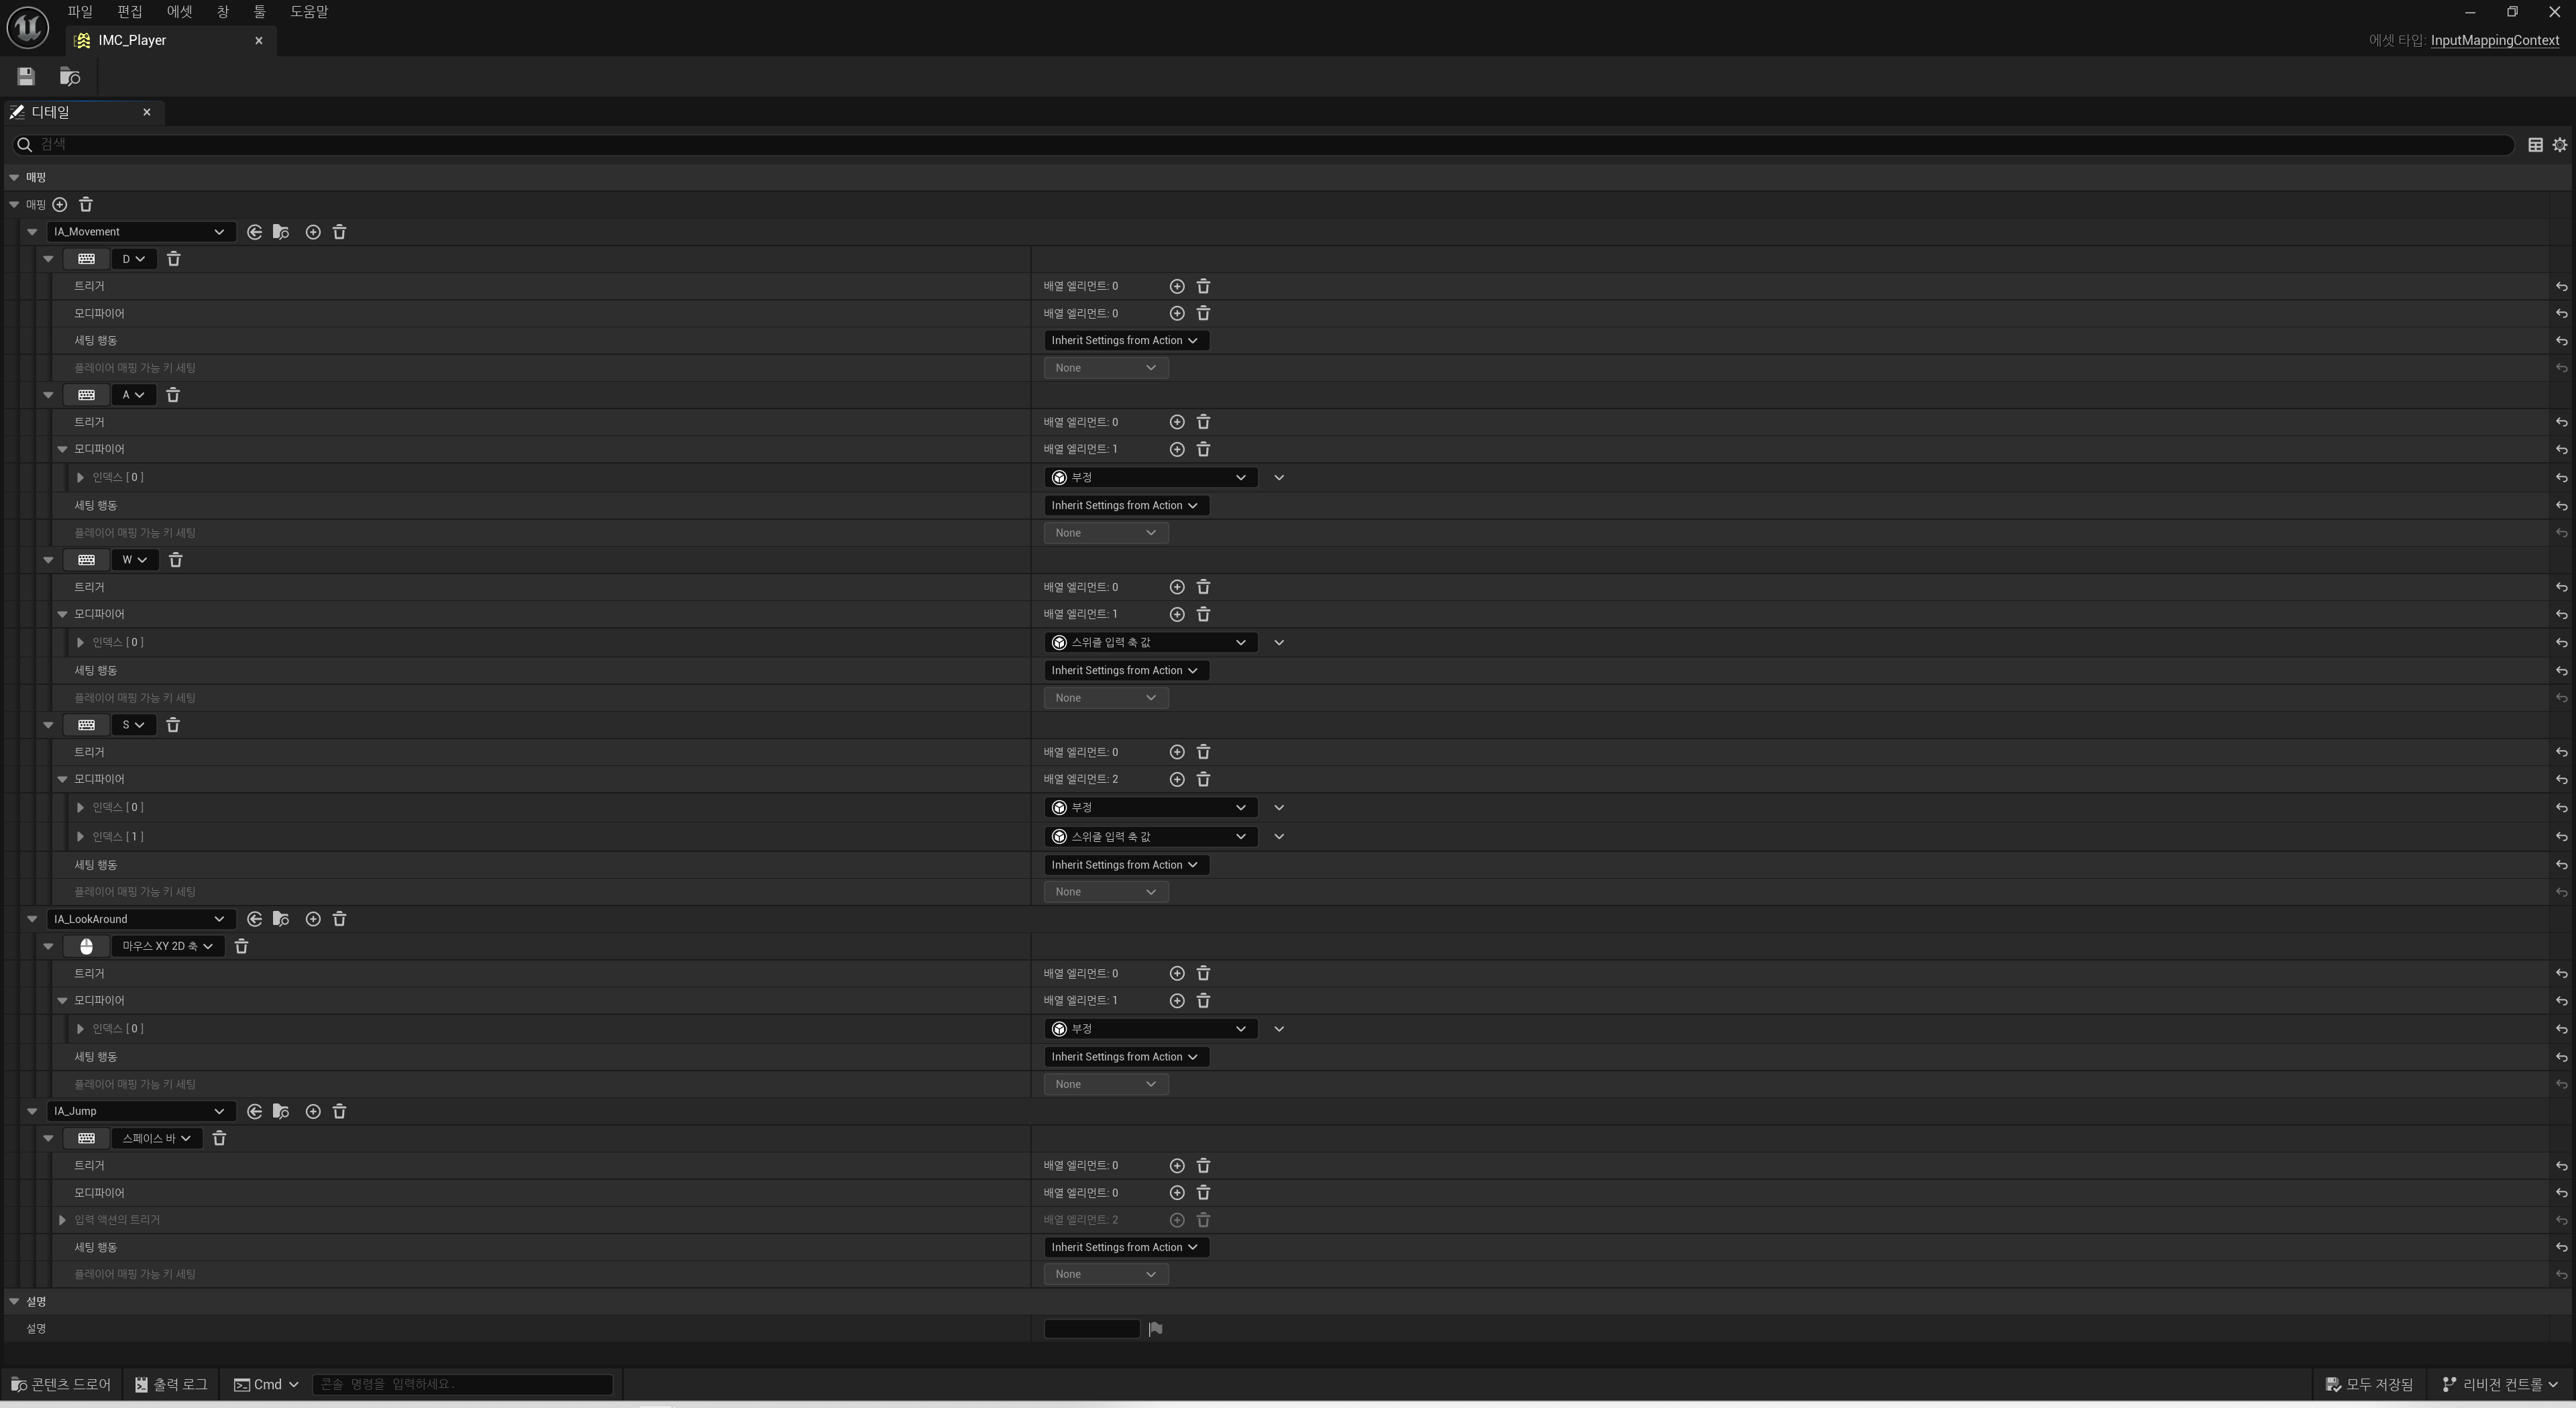
IA_Movement, IA_LookAround
캐릭터 이동 관련InputAction인 IA_Movement와 캐릭터 시선 ( 카메라 회전 ) 관련 IA_LookAround를 만듭니다.
입력 액션 은 향상된 입력 시스템과 프로젝트 코드 간의 통신 링크입니다. 입력 액션은 데이터 에셋이라는 점만 다를 뿐, 액션 및 축(Axis) 매핑 이름과 개념적으로 같습니다. 각 입력 액션은 '웅크리기'나 '무기 발사' 같은 사용자가 할 수 있는 행동을 나타내야 합니다. 입력 액션의 스테이트가 변경될 때 블루프린트 또는 C++에 입력 리스너(Input Listeners) 를 추가할 수 있습니다.
입력 액션은 여러 타입이 될 수 있으며, 타입에 따라 액션의 동작이 결정됩니다. 단순한 부울 액션을 만들 수도 있고 더욱 복잡한 3D 축을 만들 수도 있습니다. 액션 타입이 그 값을 결정합니다. 부울 액션은 단순한 bool 값을 갖고, Axis1D 는 float 값을, Axis2D 는 FVector2D , 그리고 Axis3D 는 전부 FVector 입니다.

둘다 액션의 모디파이어를 Axis2D (Vector2D)로 합니다.
IMC_Player
캐릭터 입력 매핑 컨텍스트인 IMC_Player를 만듭니다.
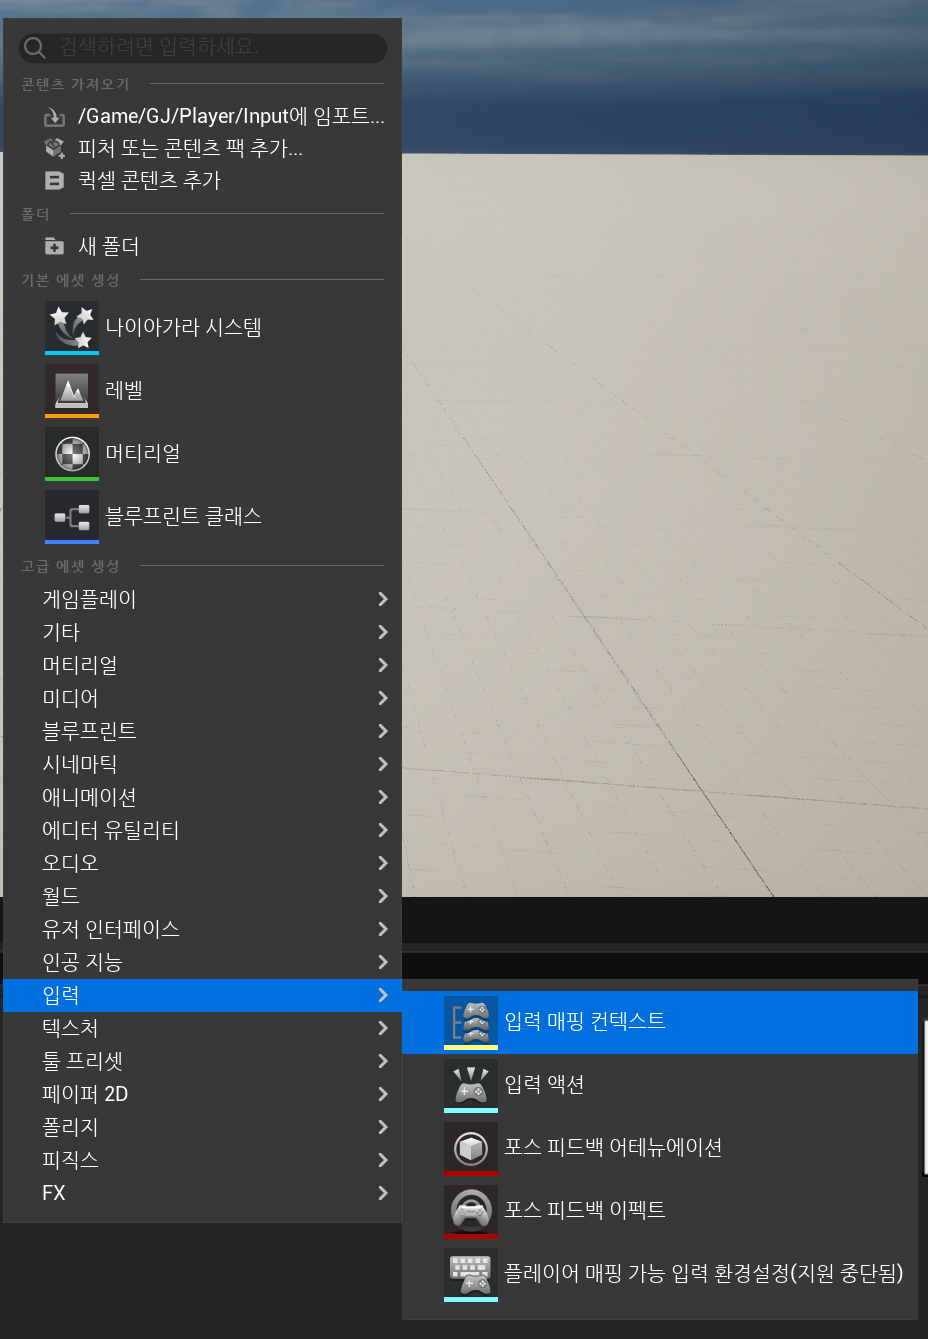
입력 매핑 컨텍스트 는 플레이어가 처할 수 있는 특정 컨텍스트를 나타내는 입력 액션 컬렉션으로, 주어진 입력 액션의 트리거 규칙을 설명합니다. 각 사용자에게 매핑 컨텍스트를 동적으로 추가하거나 제거하거나 우선순위를 지정할 수 있습니다.
입력 매핑 컨텍스트를 생성하려면 컨텍스트 브라우저 를 우클릭한 다음, 입력(Input) 옵션을 펼치고 입력 매핑 컨텍스트(Input Mapping Context) 를 선택합니다.
각각 키별로 모디파이 세팅 방법입니다.
언리얼 문서 발췌
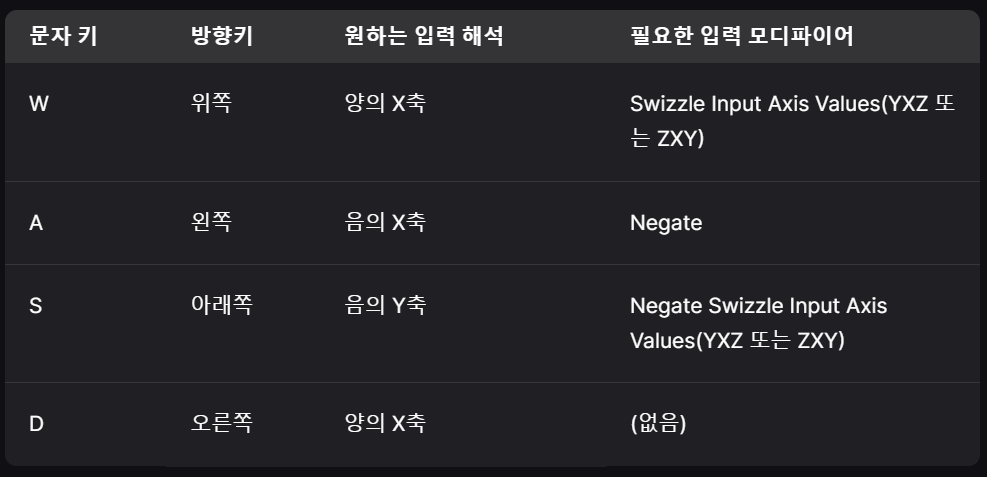
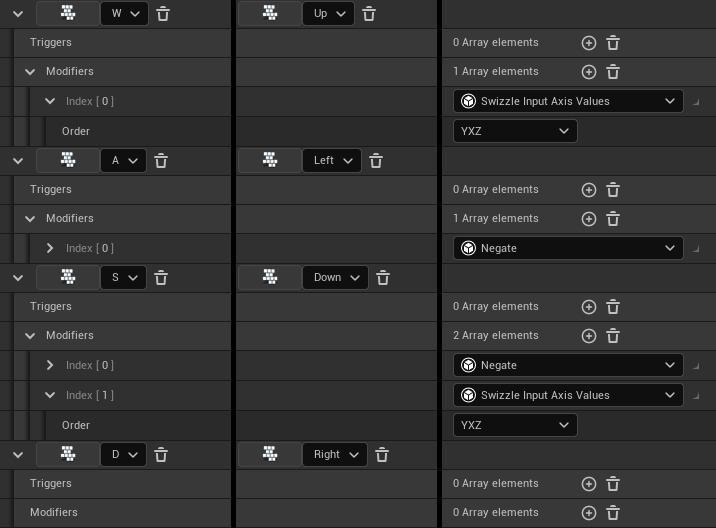
wasd말고도 점프와 카메라 키 매핑 방법
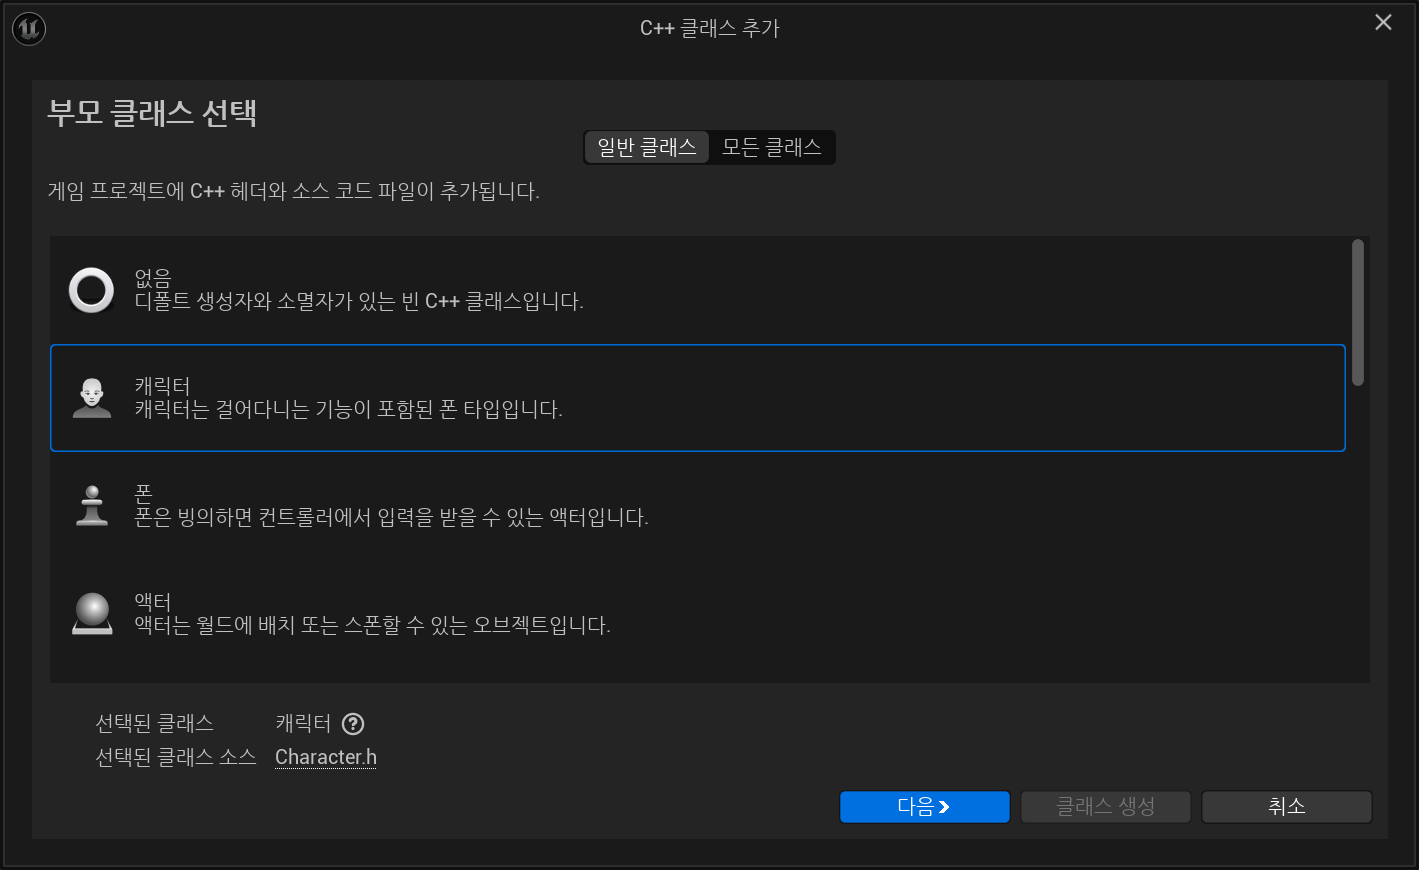
PlayerCharacter
사용할 캐릭터 cpp 클래스를 만듭니다.
아래는 전체 파일 첨부입니다.
PlayerCharacter.h
// Fill out your copyright notice in the Description page of Project Settings.

#pragma once

#include "CoreMinimal.h"
#include "GameFramework/Character.h"
#include "InputActionValue.h"
#include "PlayerCharacter.generated.h"
class UInputMappingContext;
class UInputAction;
class USpringArmComponent;
class UCameraComponent;

UCLASS()
class WINTER_API APlayerCharacter : public ACharacter
{
	GENERATED_BODY()

public:
	// Sets default values for this character's properties
	APlayerCharacter();

protected:
	// Called when the game starts or when spawned
	virtual void BeginPlay() override;

	// 입력 맵핑 컨텍스트
	UPROPERTY(EditAnywhere, Category=Input)
	UInputMappingContext * PlayerContext;

	// 이동
	UPROPERTY(EditAnywhere, Category = Input)
	UInputAction* MovementAction;

	// 점프
	UPROPERTY(EditAnywhere, Category = Input)
	UInputAction* JumpAction;

	// 카메라
	UPROPERTY(EditAnyWhere, Category = Input)
	UInputAction* LookAction;

	void Look(const FInputActionValue& value);
	void Move(const FInputActionValue& value);
	void Jump() override;
private:
	// 카메라 붐
	USpringArmComponent* CameraBoom;
	// 카메라
	UCameraComponent* ViewCamera;
public:
	// Called every frame
	virtual void Tick(float DeltaTime) override;

	// Called to bind functionality to input
	virtual void SetupPlayerInputComponent(class UInputComponent* PlayerInputComponent) override;

};
PlayerCharacter.cpp
// Fill out your copyright notice in the Description page of Project Settings.


#include "PlayerCharacter.h"
#include "EnhancedInputSubsystems.h"
#include "Camera/CameraComponent.h"
#include "Components/CapsuleComponent.h"
#include "GameFramework/CharacterMovementComponent.h"
#include "GameFramework/SpringArmComponent.h"
#include "EnhancedInputComponent.h"
// Sets default values
APlayerCharacter::APlayerCharacter()
{


 	// Set this character to call Tick() every frame.  You can turn this off to improve performance if you don't need it.
	PrimaryActorTick.bCanEverTick = true;

	// 충돌 캡슐 크기 설정
	GetCapsuleComponent()->InitCapsuleSize(42.f, 96.0f);

	// 캐릭터 회전
	bUseControllerRotationPitch = false;
	bUseControllerRotationYaw = false;
	bUseControllerRotationRoll = false;

	// 캐릭터 이동 관련
	GetCharacterMovement()->bOrientRotationToMovement = true;
	GetCharacterMovement()->RotationRate = FRotator(0.0f, 500.0f, 0.0f);

	// 빠른 반복 작업을 위해 이러한 변수들은 캐릭터 블루프린트에서 조정 가능
	GetCharacterMovement()->JumpZVelocity = 700.f;
	GetCharacterMovement()->AirControl = 0.35f;
	GetCharacterMovement()->MaxWalkSpeed = 500.f;
	GetCharacterMovement()->MinAnalogWalkSpeed = 20.f;
	GetCharacterMovement()->BrakingDecelerationWalking = 2000.f;
	GetCharacterMovement()->BrakingDecelerationFalling = 1500.0f;

	// 카메라 붐
	CameraBoom = CreateDefaultSubobject<USpringArmComponent>(TEXT("CameraBoom"));
	CameraBoom->SetupAttachment(RootComponent);
	CameraBoom->TargetArmLength = 400.0f;
	CameraBoom->bUsePawnControlRotation = true;


	// 카메라
	ViewCamera = CreateDefaultSubobject<UCameraComponent>(TEXT("ViewCamera"));
	ViewCamera->SetupAttachment(CameraBoom, USpringArmComponent::SocketName);
	ViewCamera->bUsePawnControlRotation = false;

}

// Called when the game starts or when spawned
void APlayerCharacter::BeginPlay()
{
	Super::BeginPlay();


}

// Called every frame
void APlayerCharacter::Tick(float DeltaTime)
{
	Super::Tick(DeltaTime);

}

// Called to bind functionality to input
void APlayerCharacter::SetupPlayerInputComponent(UInputComponent* PlayerInputComponent)
{
	// UEnhancedInputLocalPlayerSubsystem 설정
	if (APlayerController* PlayerController = Cast<APlayerController>(GetController()))
	{
		if (UEnhancedInputLocalPlayerSubsystem* Subsystem = ULocalPlayer::GetSubsystem<UEnhancedInputLocalPlayerSubsystem>(PlayerController->GetLocalPlayer()))
		{
			Subsystem->AddMappingContext(PlayerContext, 0);
		}
	}
	// 바인딩 설정
	Super::SetupPlayerInputComponent(PlayerInputComponent);
	if (UEnhancedInputComponent* EnhancedInputComponent = CastChecked<UEnhancedInputComponent>(PlayerInputComponent))
	{
		EnhancedInputComponent->BindAction(MovementAction, ETriggerEvent::Triggered, this, &APlayerCharacter::Move);
		EnhancedInputComponent->BindAction(JumpAction, ETriggerEvent::Triggered, this, &APlayerCharacter::Jump);
		EnhancedInputComponent->BindAction(LookAction, ETriggerEvent::Triggered, this, &APlayerCharacter::Look);
	}
}
void APlayerCharacter::Move(const FInputActionValue& value)
{
	// 플레이어 이동
	const FVector2D MovementVector = value.Get<FVector2D>();

	if (Controller != nullptr)
	{
		const FRotator Rotation = Controller->GetControlRotation();
		const FRotator YawRotation(0, Rotation.Yaw, 0);

		// 앞 벡터
		const FVector ForwardDirection = FRotationMatrix(YawRotation).GetUnitAxis(EAxis::X);
		// 오른쪽 벡터
		const FVector RightDirection = FRotationMatrix(YawRotation).GetUnitAxis(EAxis::Y);

		AddMovementInput(ForwardDirection, MovementVector.Y);
		AddMovementInput(RightDirection, MovementVector.X);
	}
	else
	{
		GEngine->AddOnScreenDebugMessage(-1, 5.f, FColor::Red, TEXT("Controller is null"));
	}
}
void APlayerCharacter::Jump()
{
	Super::Jump();
}

// 카메라
void APlayerCharacter::Look(const FInputActionValue& value)
{
	const FVector2D LookVector = value.Get<FVector2D>();
	if (Controller != nullptr)
	{
		// 좌우
		AddControllerYawInput(LookVector.X);
		// 상하
		AddControllerPitchInput(LookVector.Y);
	}
	else
	{
		GEngine->AddOnScreenDebugMessage(-1, 5.f, FColor::Red, TEXT("Controller is null"));
	}

}
BP_PlayerCharacter
코드를 작성하였으면 자식클랙스로 BP_PlayerCharacter를 만듭니다.
BP_PlayerCharacter 안에서 입력에 있는
컨텍스트와 입력액션들을 맵핑해줍니다.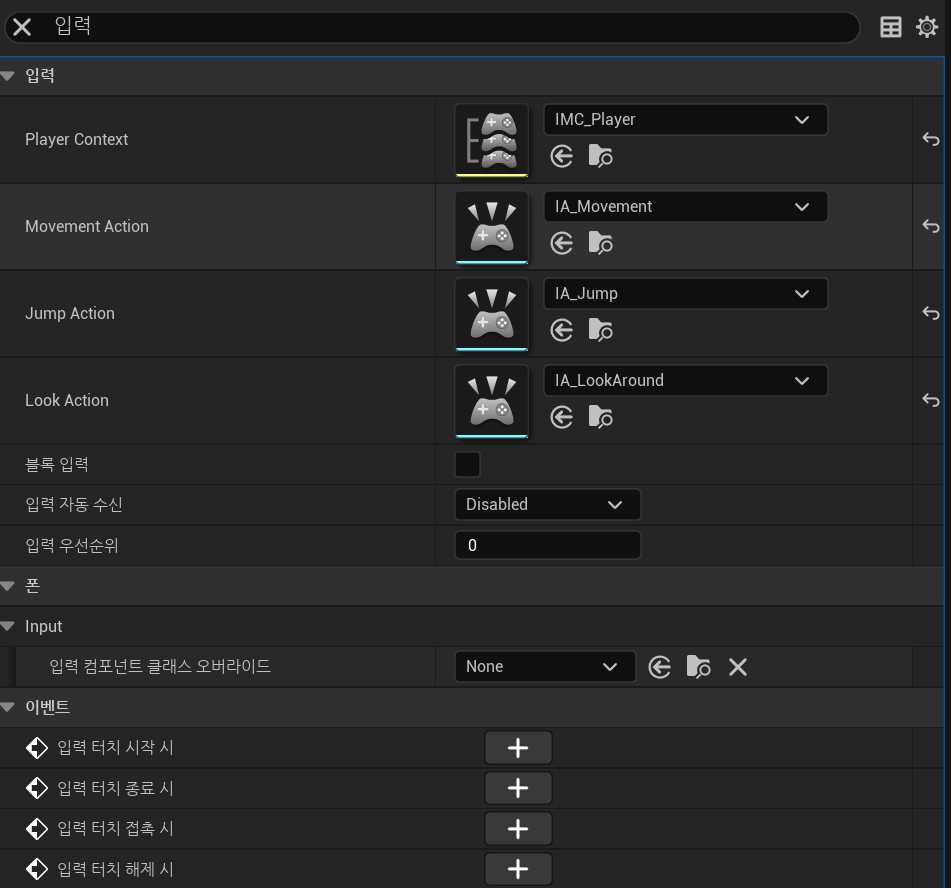
메시와 애니메이션 블루프린트를 넣어줍니다.
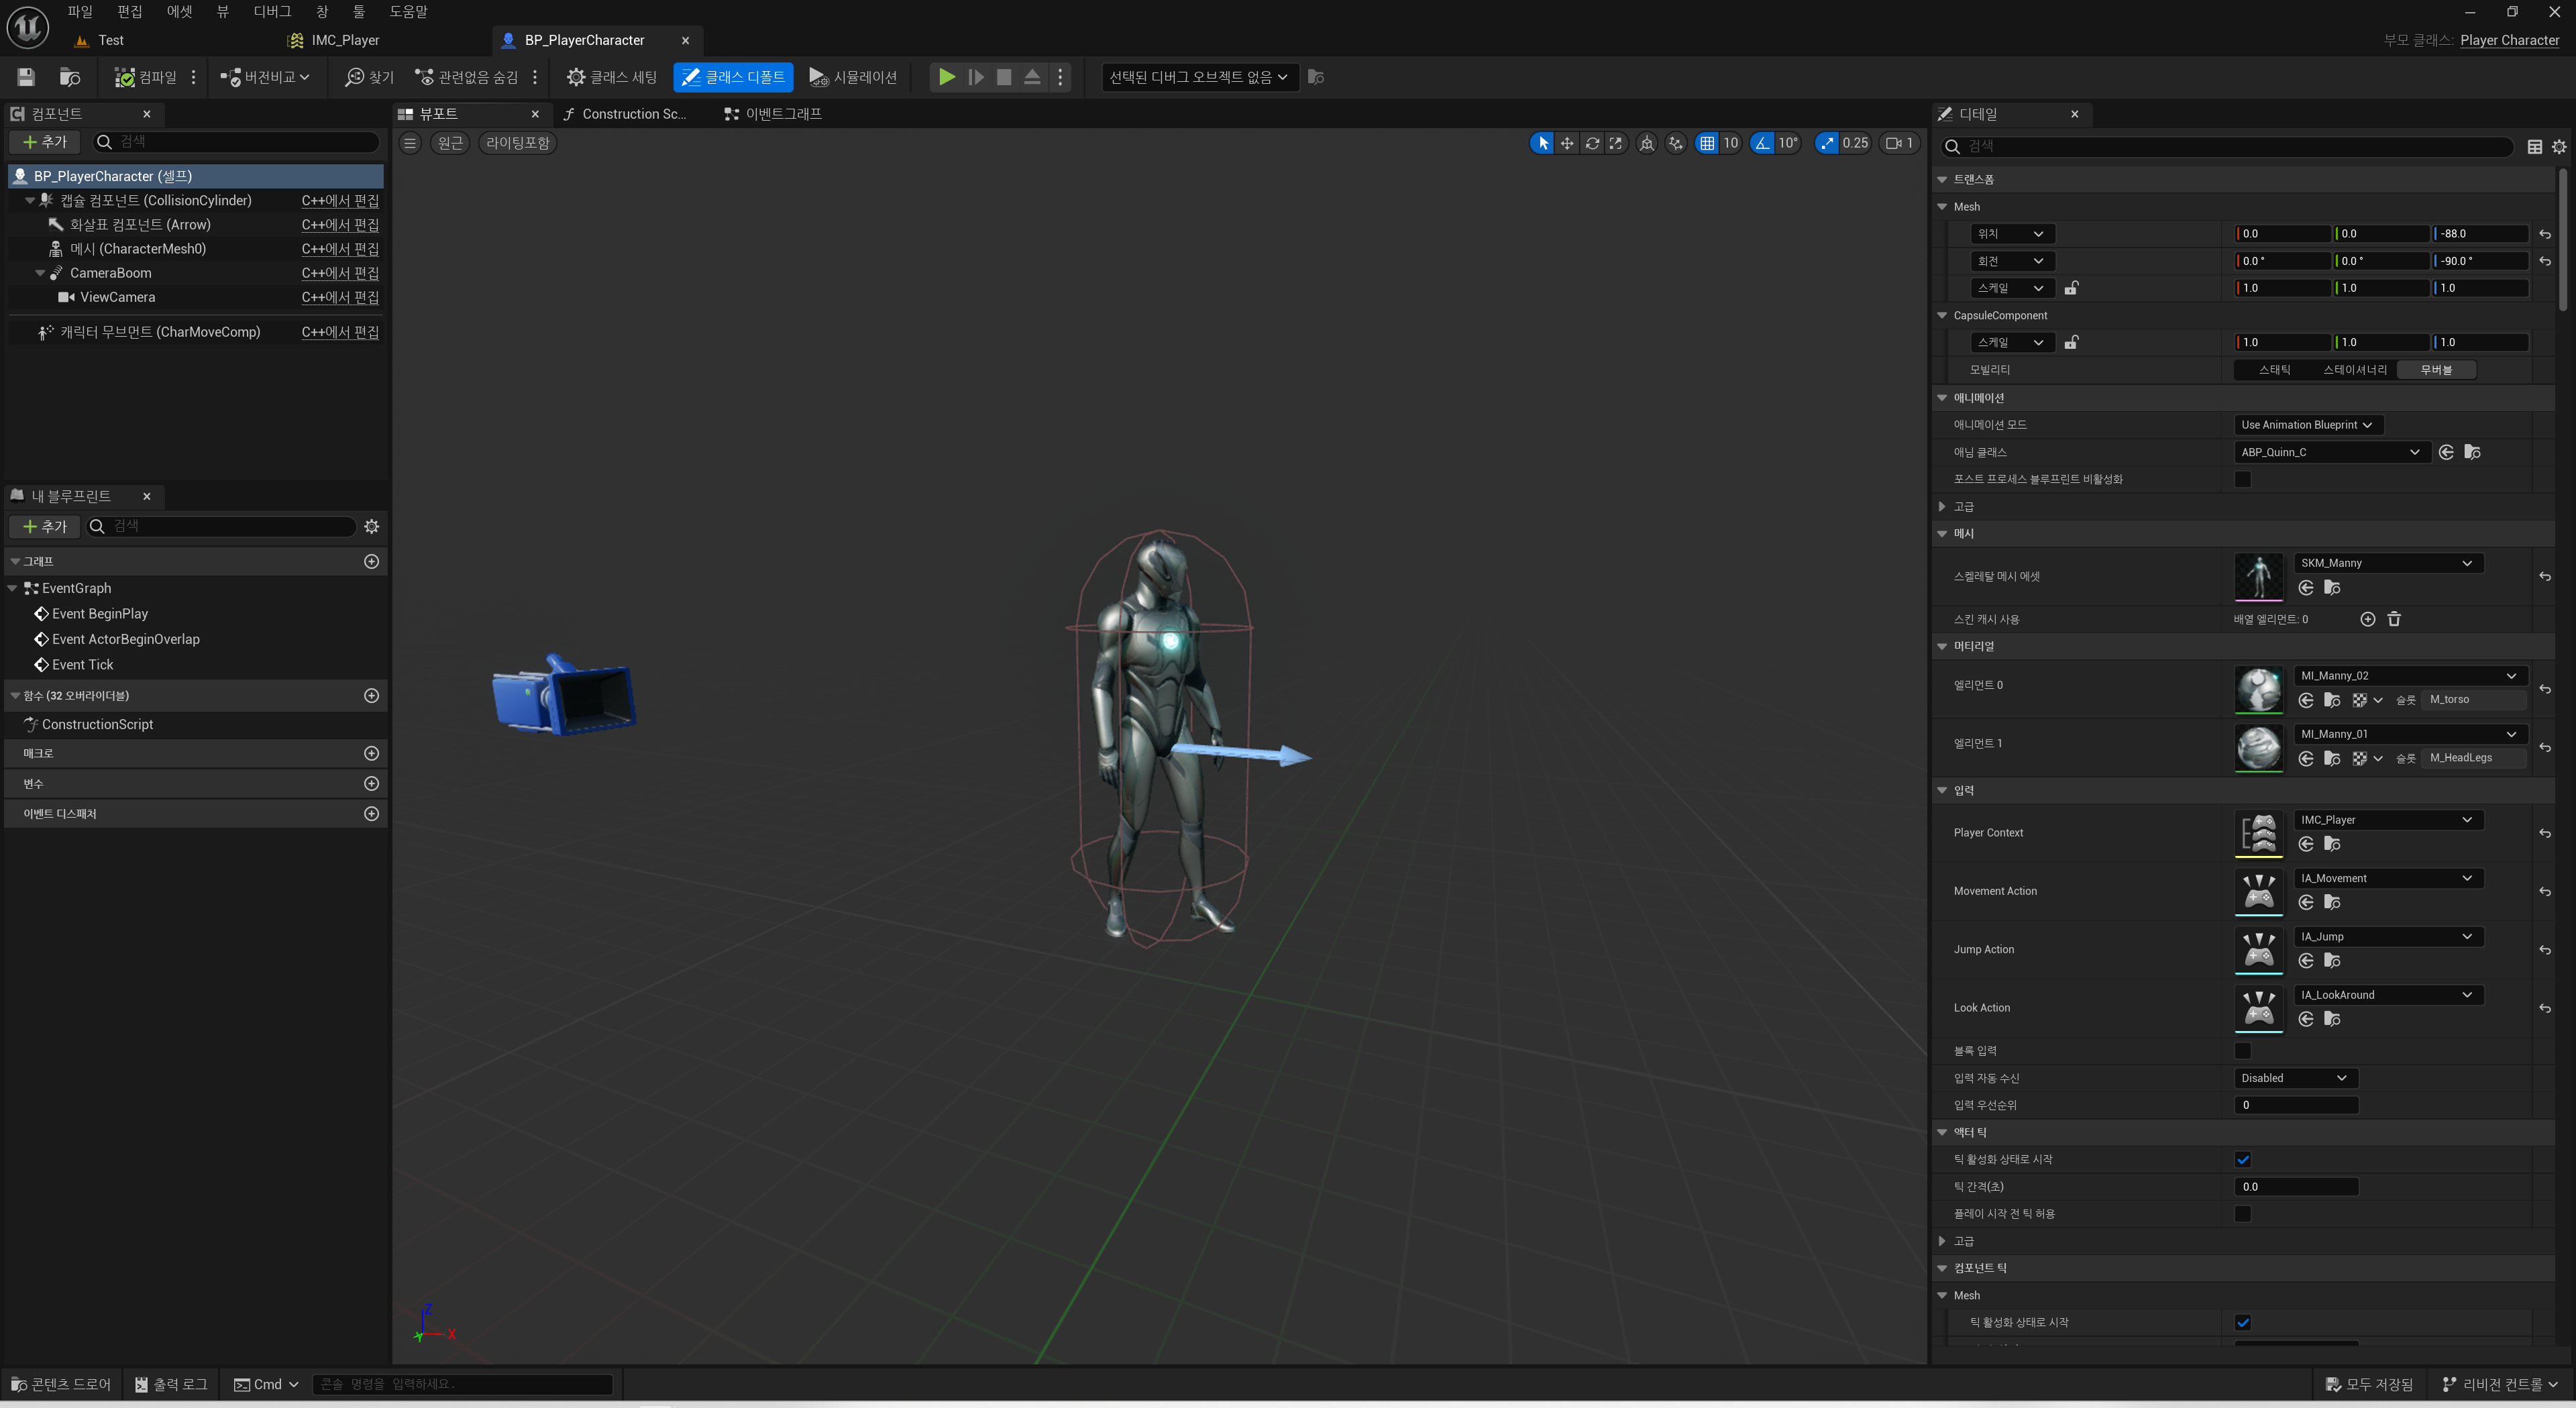
게임모드의 디폴트 폰 클래스를 변경해주고 테스트 해봅니다.

실행 영상
'Unreal Engine 5 > How To Use' 카테고리의 다른 글
| 언리얼 엔진 5 / Procedural Dungeons ( 절차적 던전 생성 ) 2 (0) | 2025.04.10 |
|---|---|
| 언리얼 엔진 5 / Procedural Dungeons ( 절차적 던전 생성 ) 1 (0) | 2025.04.10 |
| 언리얼 엔진 5 / 애니메이션 루트 모션 (0) | 2024.11.22 |
| 언리얼 엔진 5 / 애니메이션 블루프린트 (0) | 2024.10.28 |
| 언리얼 엔진 5 / 캐릭터에 무기 끼우기 ( 소켓 추가 ) (0) | 2024.10.28 |